Documentation
Getting Started
Installation
Installation requires you to download the installer and then run it on your device.
-
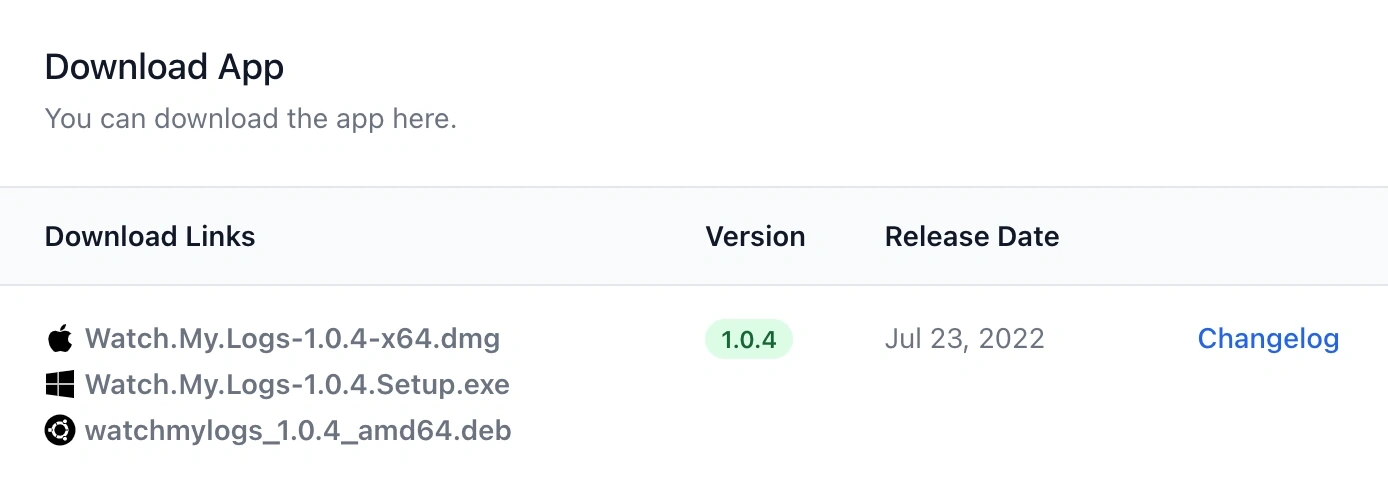
Login into your account using the License Key from order confirmation email and download the installer that matches your OS from the downloads page:
- Double click the downloaded file and follow installer instructions.
- When the installation is completed you can finally run the App.
First run
Find "Watch my logs!" using your OS App launcher and press Enter. If your OS will ask if you really want to run the app, select "Yes".
xattr -c "/Applications/Watch My Logs.app". Now, find "Watch My Logs!" in the Applications folder, right click on the App and choose "Open" in the context menu.
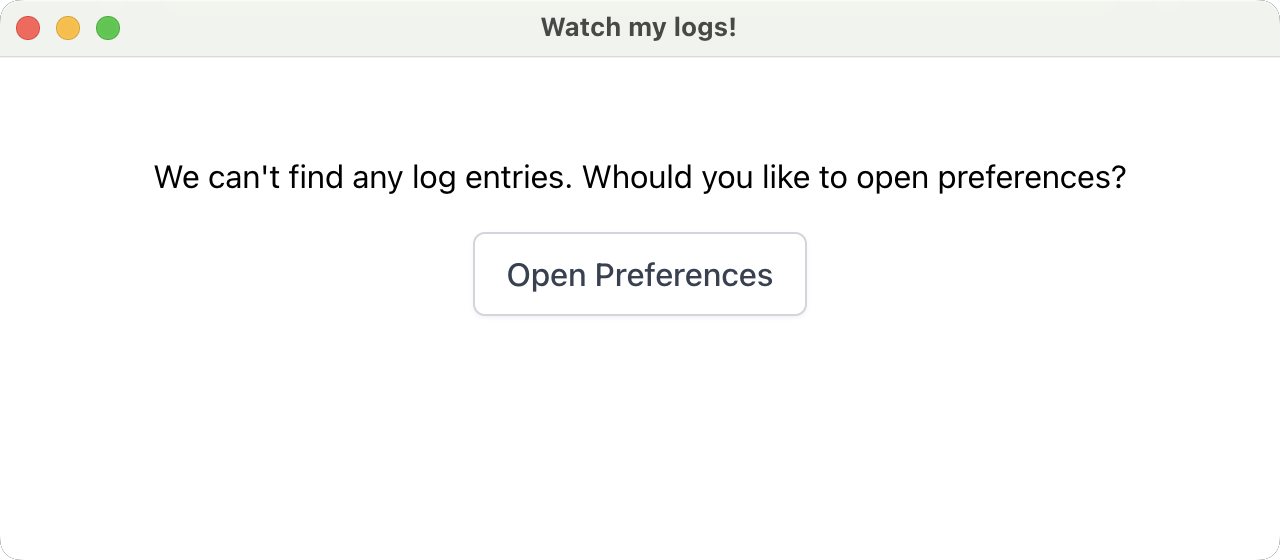
After initial launch, you'll see the Main Screen with "Open Preferences" button:
Settings
You can open settings window with right click on the main window, then choose "Preferences" in the context menu.
General
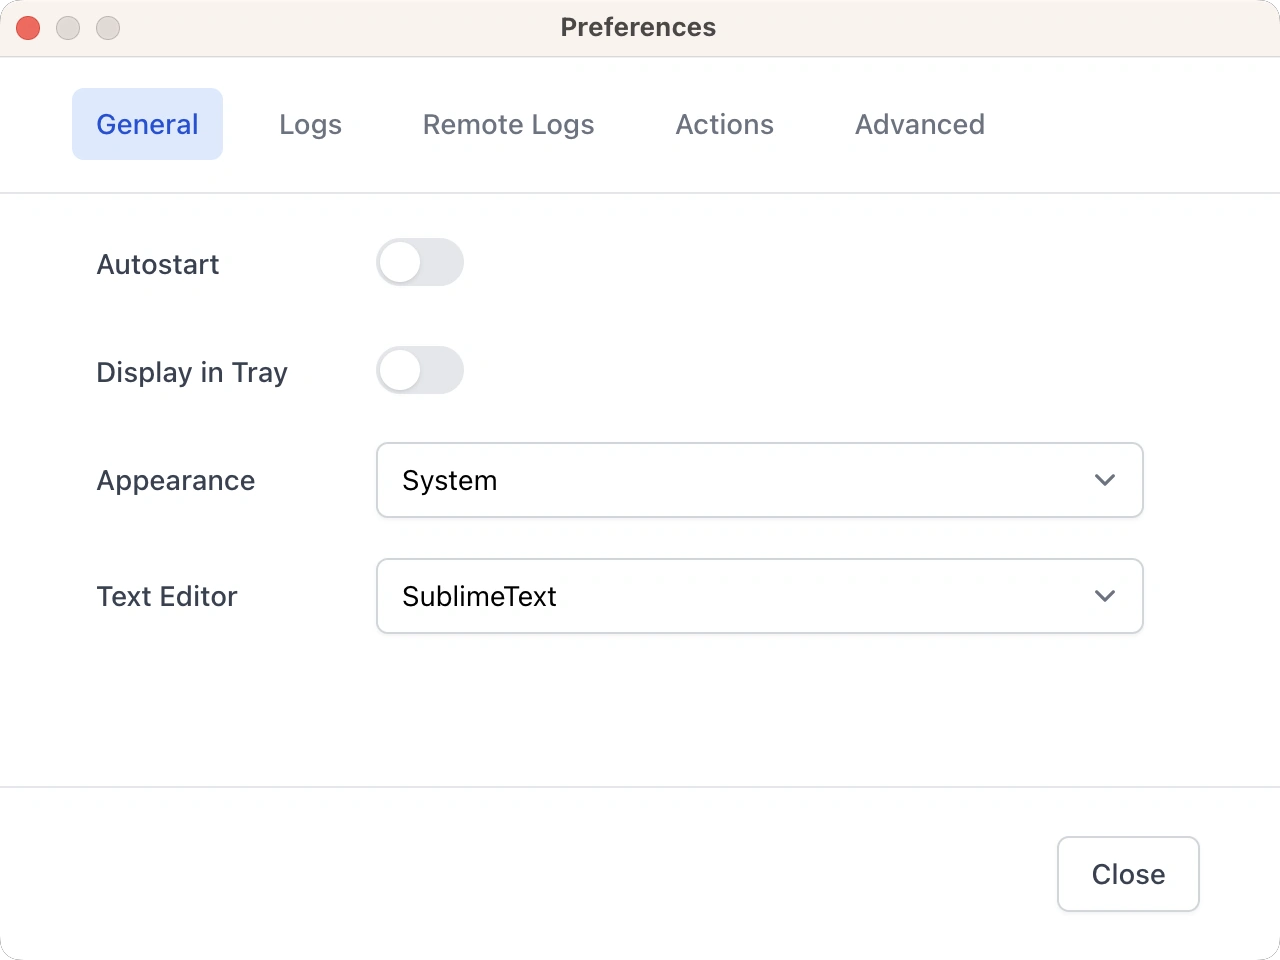
General settings screen allows you to:
- Enable application autostart when you logging in into OS.
- Display app icon in tray. When enabled, and app is minimized, it will not
- Choose one of appearance options: System, Light, Dark.
- Select text editor to open when clicking on the file paths. The list of available editors: Atom, SublimeText, TextMate, PhpStorm, VS Code, VS Code Insiders.
Logs
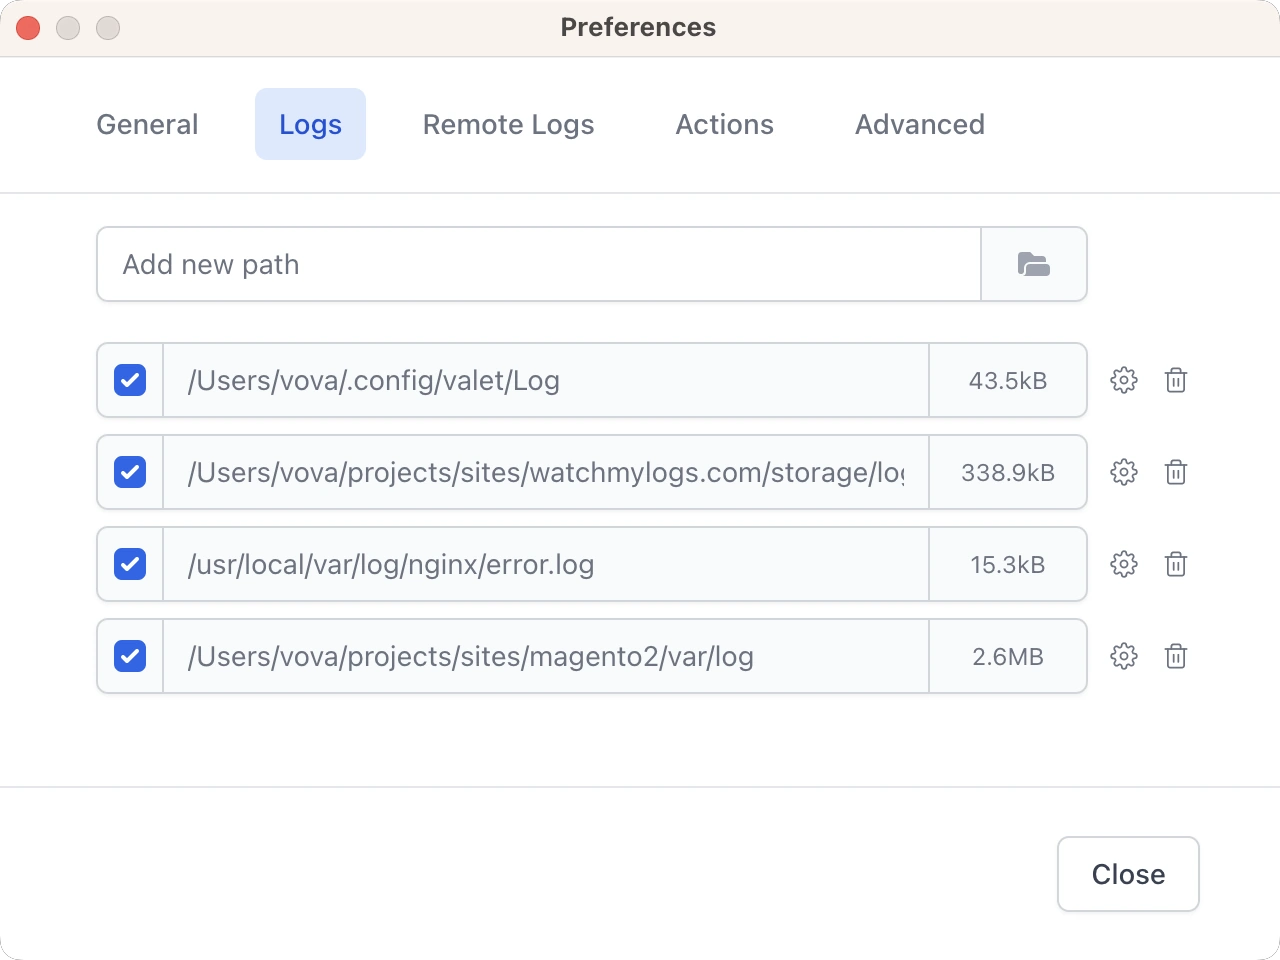
Logs settings screen allows you to:
- Add/Remove/Enable/Disable log sources. Log source is a folder with *.log files or a *.log files.
- Truncate log sources.
- Setup configuration per log source. For now, there is one config option available that allows to replace part of the path. This options was added specifically for Docker users to fix not working clickable file paths.
Remote logs
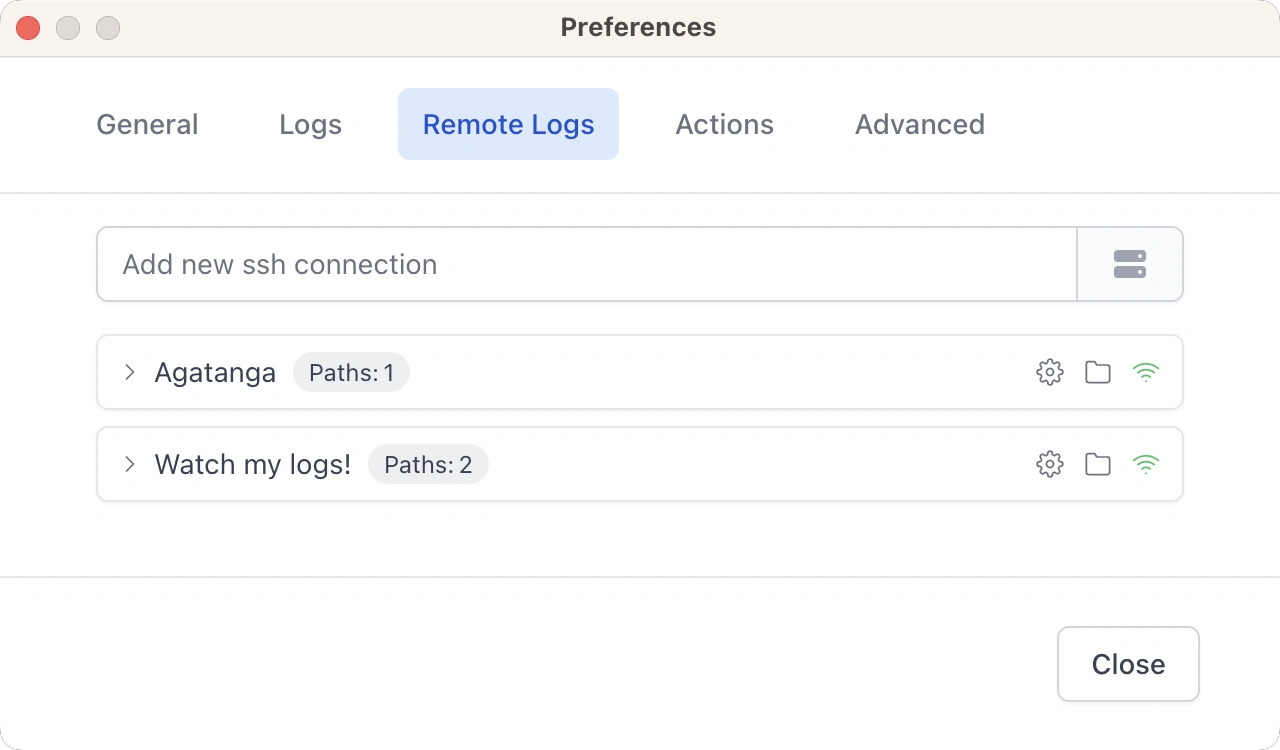
Remote logs settings screen allows you to:
- Add/Remove ssh connections.
- Connect/Disconnect from the servers. The state of each connection persist between app sessions.
- Add/Remove/Enable/Disable paths to log sources. Log source is a folder with *.log files or a *.log files.
Actions
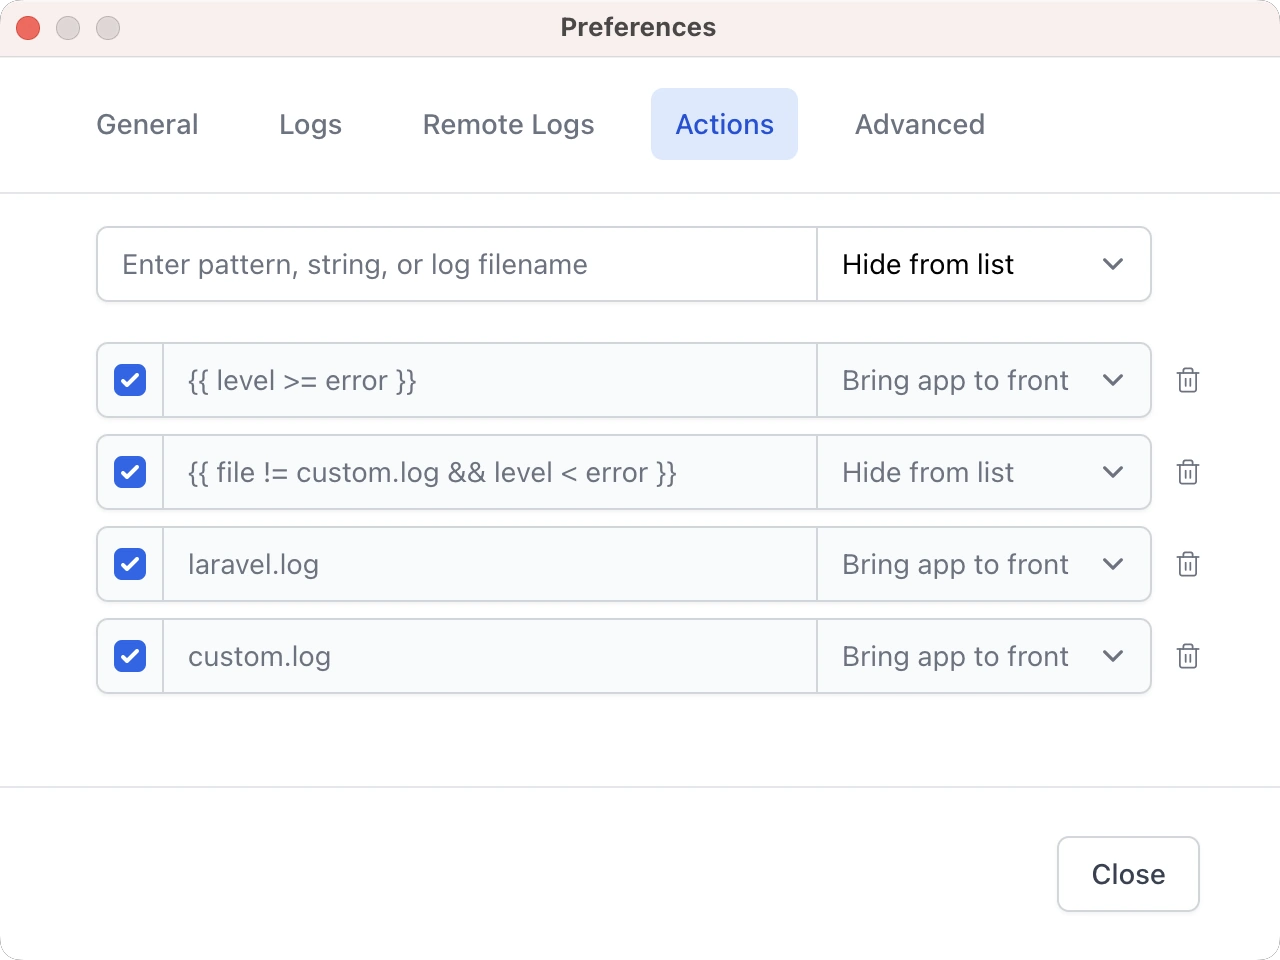
The easiest way to add an action - is to select a text in the main window and right click on it.
The following actions available:
- Hide from list
- Bring app to front
- Notify
The action is triggered when condition is true for the log entry. You can use:
- Simple string —
A string - Log filename —
error.log - Regex pattern —
Task .* is finished - Logical statement —
{{ file != custom.log && level < error }}
Here is the list of available variables to use inside logical statement:
| Variable | Description |
|---|---|
| file |
Log source filename. Example:
{{ file == filename.log }}
|
| level |
Log record severity level. Example:
{{ level >= error }}.
Available levels:
|
Advanced
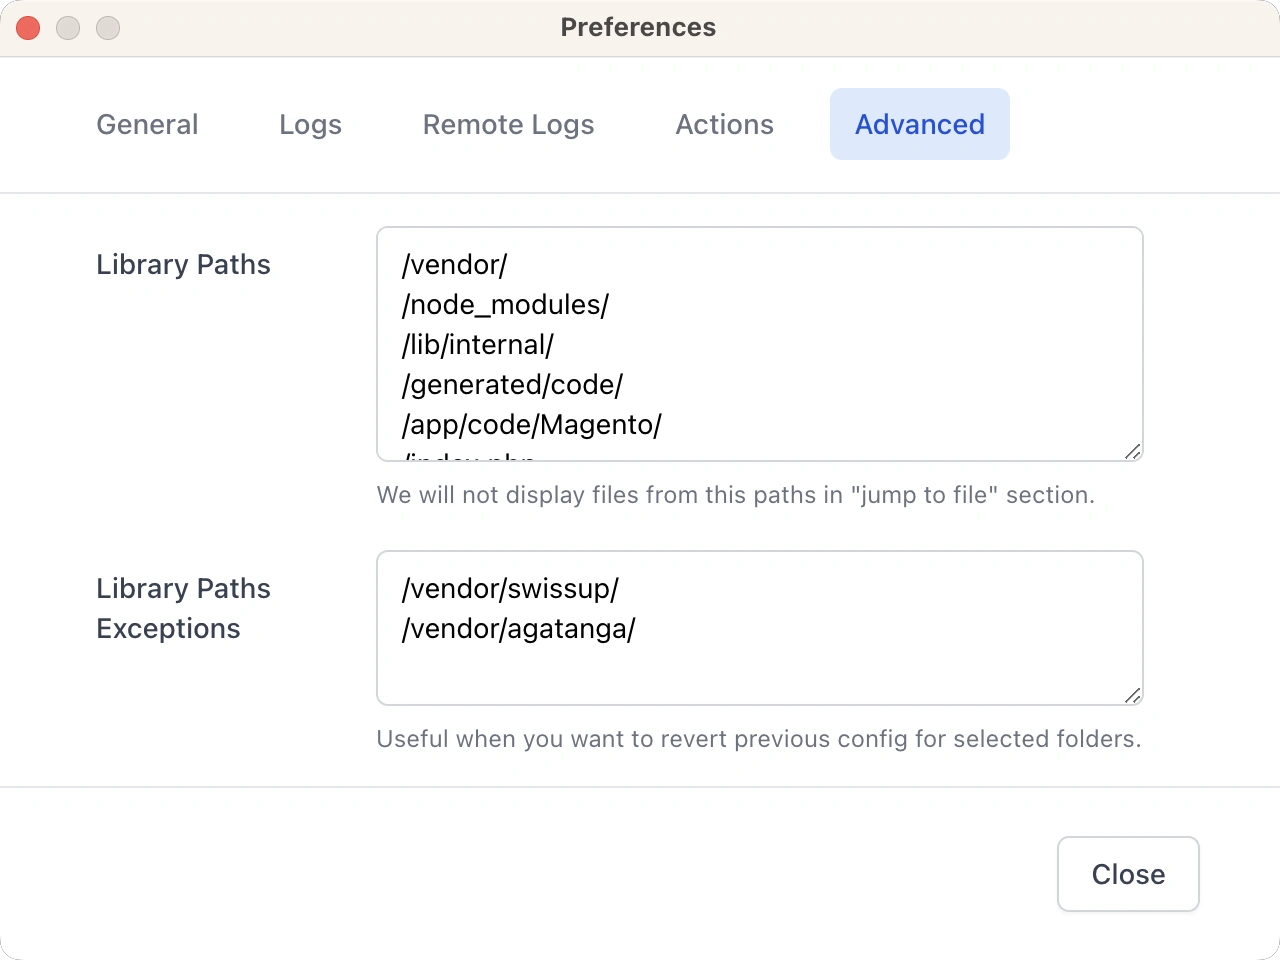
Advanced settings screen allows you to:
- Edit library paths — the list of paths that are excluded from "jump to file" panel.
- Edit library paths exceptions — useful when you exclude "/vendor/" folder, but still want to include "/vendor/mycompany/" path.
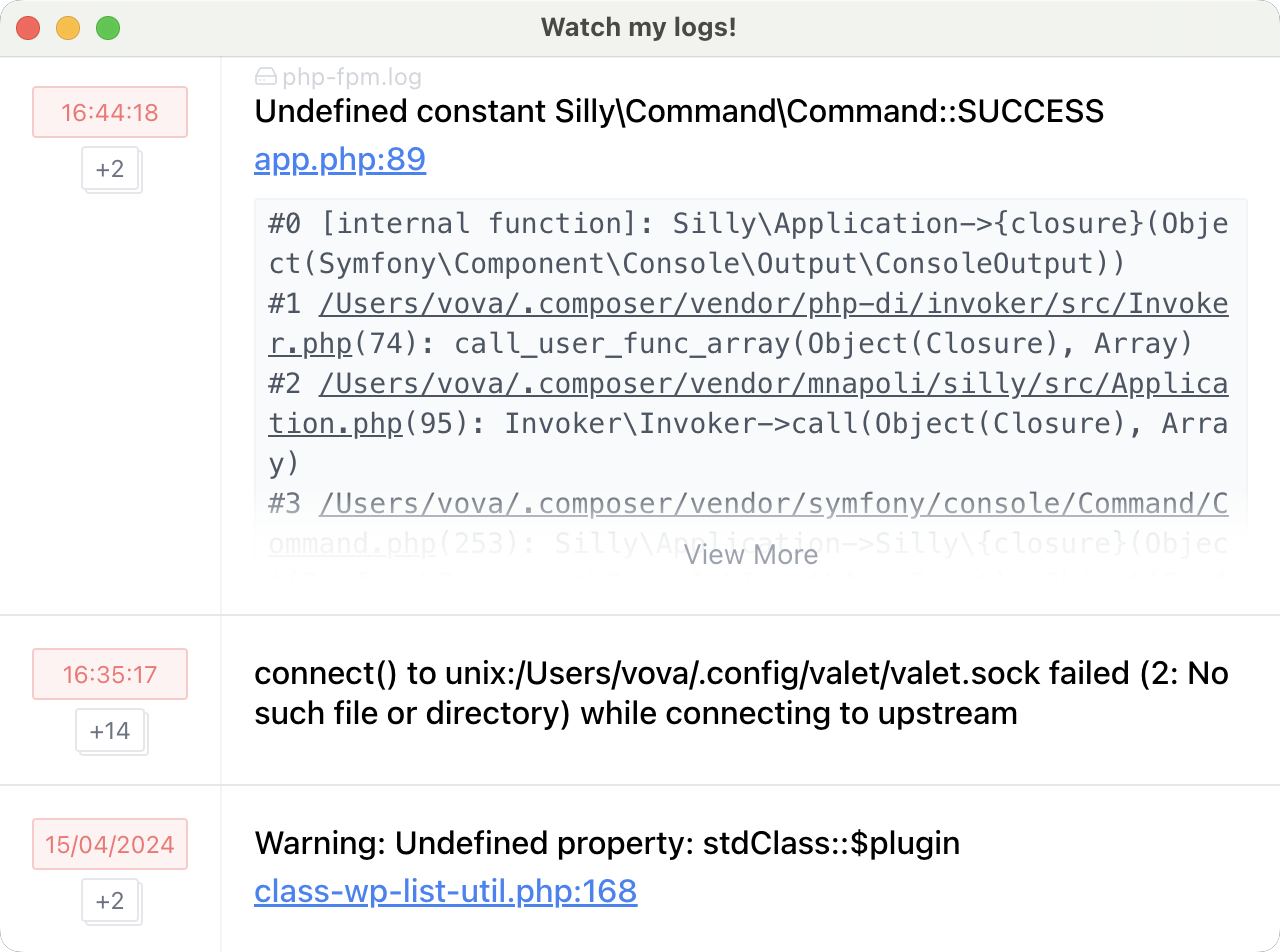
Main Screen
Main screen — is a feed of recent log entries found in remote and local log sources.
General
When log sources are set and app found the records, the main screen will show them sorted by date. The feed is automatically updated when a new records are found in any of the log sources. The newest records added to the top of the list:
Search panel
Press CMD+F or CTRL+F to open search panel:
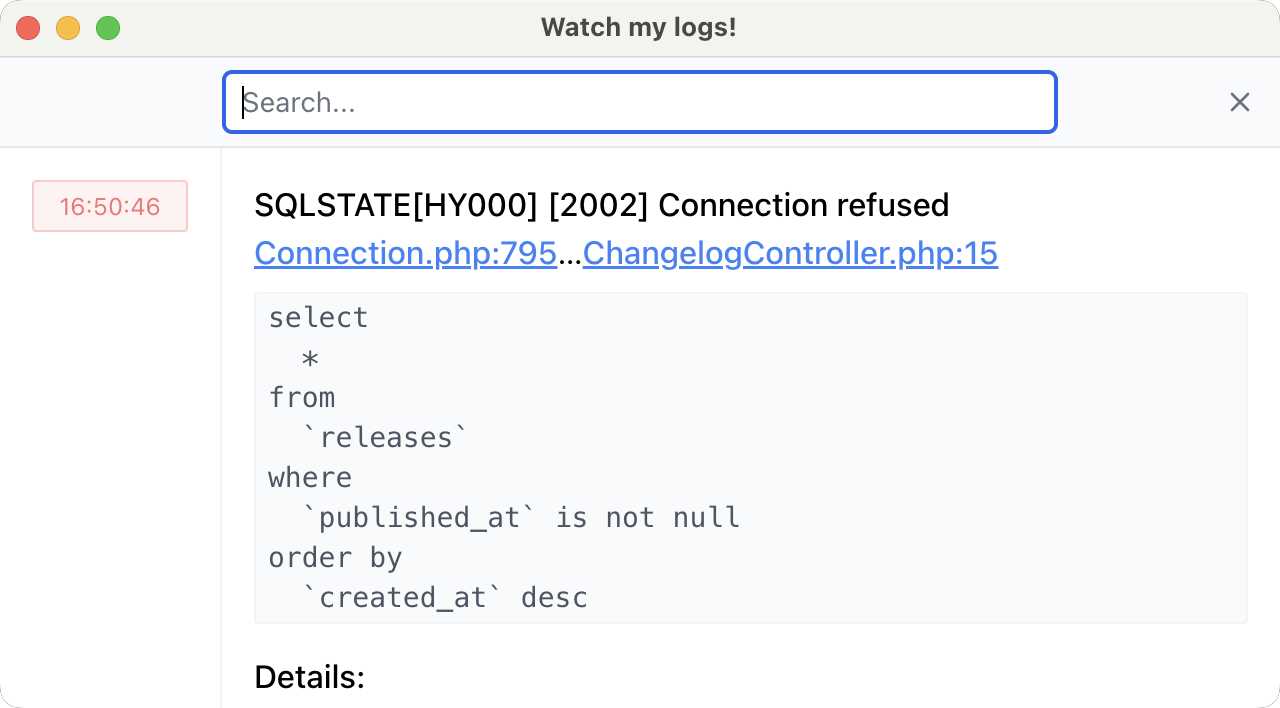
You may use the following format for the search input string:
- Simple string —
Connection - Logical statement —
{{ file == name.log && level >= error && date >= 2024 }}
Here is the list of available variables to use inside logical statement:
| Variable | Description |
|---|---|
| file |
Log source filename. Example:
{{ file == filename.log }}
|
| text |
Raw entry value. Example:
{{ text ~ deprecated }}
|
| date |
Log record date. Examples:{{ date >= 2024-04-28 16:50:46 }}{{ date >= 2024-04 }}
|
| level |
Log record severity level. Example:
{{ level >= error }}.
Available levels:
|
| title |
Log title. Example:
{{ title ~ Error }}
|
| body |
Log body. Example:
{{ body ~ Error }}
|
| ip_address |
Log entry IP Address. Example:
{{ ip_address !^ 1. }}
|
| port |
Log entry port. Example:
{{ port == 30567 }}
|
| referer |
Log entry referer. Example:
{{ referer !~ example.com }}
|
And here is the list of available comparators to use inside logical statement:
| Comparator | Description |
|---|---|
| ==, !=, <=, >=, <, > |
Full equalilty comparators. Examples:{{ file == filename.log }}{{ level >= error }}
|
| ~, !~, ^, !^ |
Partial equality comparators. Examples:{{ text ~ too big }} — text contains `too big`{{ body ^ Warning }} — body starts with `Warning`{{ ip_address !^ 1. }} — ip_address is not starting with `1.`
|
Context menu
Use the right mouse to show context menu. It will also display a quick actions if you select some text in the feed:
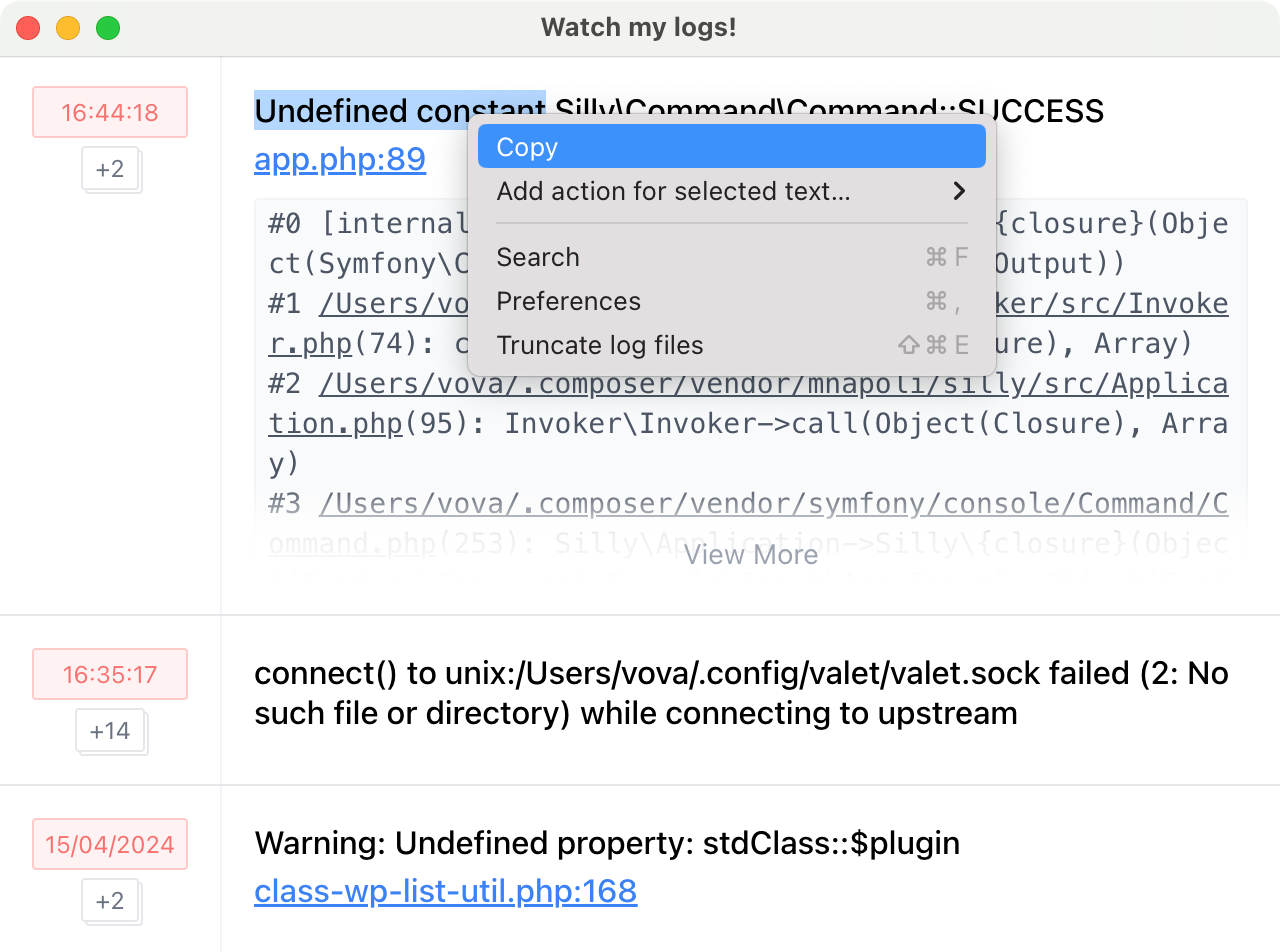
Use right click on selected text to quickly create actions or find similar log records!
Shortcuts
There are few shortcuts available when main screen is active:
- CMD+, or CTRL+, — open settings window.
- CMD+R or CTRL+R — rescan all log files.
- CMD+F or CTRL+F — open search panel.
- CMD+SHIFT+E or CTRL+SHIFT+E — truncate all log files.